Android藍牙連接a2dp藍牙耳機
開發環境:
開發工具:Androidstudio 適配機型:honor8(Android6.0), 堅果R1(Android8.0) 開發功能:Android中藍牙連接A2DP設備,藍牙耳機設備功能實現:
本應用提供以下功能: 第一:開啓藍牙 第二:查找過濾掉A2DP設備 第三:連接A2DP設備 第四:斷開連接A2DP設備 第五:保存通過本應用連接的A2DP設備 第六:當重新啓動應用時加載已連接的設備A2dp介紹
A2DP全名是Advanced Audio Distribution Profile 藍牙音頻傳輸模型協定。 A2DP是能夠採用耳機內的芯片來堆棧數據,達到聲音的高清晰度。然而並非支持A2DP的耳機就是藍牙立體聲耳機,立體聲實現的基本要求是雙聲道,所以單聲道的藍牙耳機是不能實現立體聲的。聲音能達到44.1kHz,一般的耳機只能達到8kHz。如果手機支持藍牙,只要裝載A2DP協議,就能使用A2DP耳機了。還有消費者看到技術參數提到藍牙V1.0 V1.1 V1.2 V2.0——這些是指藍牙的技術版本,是指通過藍牙傳輸的速度,他們是否支持A2DP具體要看藍牙產品製造商是否使用這個技術代碼介紹
代碼結構如下 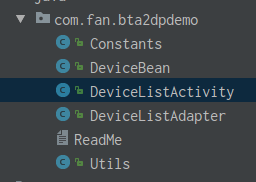本應用共包含五個java文件:
Constants:常量值定義文件
Utils:工具類,包含log包裝,toast包裝,以及sharedpreference的包裝
DeviceBean:封裝BluetoothDevice, 包含device信息
DeviceListAdapter:ListView的適配器,其中有對list列表,按鈕點擊事件的處理
DeviceListActivity:應用中的唯一UI界面
其中readMe爲說明文件
開啓藍牙代碼:
向系統發送請求,開啓藍牙,該過程會請求用戶同意開啓藍牙
Intent intent = new Intent(BluetoothAdapter.ACTION_REQUEST_ENABLE);
接下來開啓藍牙掃描,
btAdapter.startDiscovery();
在掃描過程中過濾掉非A2DP的設備
if (btClass.getMajorDeviceClass() != BluetoothClass.Device.Major.AUDIO_VIDEO) { /**本demo只處理a2dp設備,所以只顯示a2dp,過濾掉其他設備*/ break; }
之後點擊界面的connect按鈕連接對應設備
Method method = BluetoothA2dp.class.getMethod("connect", new Class[]{BluetoothDevice.class}); method.invoke(bluetoothA2dp, device);
在連接成功後可以斷開對應設備
Method method = BluetoothA2dp.class.getMethod("disconnect", new Class[]{BluetoothDevice.class}); method.invoke(bluetoothA2dp, device);
當應用退出或者進程被殺死後,重新進入應用時會加載原先已連接的藍牙設備。
/**
     * 獲取到保存的a2dp連接
     * @param context
     * @return
     */
    static DeviceBean fetchConnectedDevice(Context context){
        DeviceBean deviceBean = null;
        SharedPreferences sharedPreferences = context.getSharedPreferences(
                Constants.PREF_CONNECTED_DEVICE, Context.MODE_PRIVATE);
        String name = sharedPreferences.getString(Constants.PREF_DEVICE_NAME, null);
        String address = sharedPreferences.getString(Constants.PREF_DEVICE_ADDRESS, null);
        if (address != null) {
            deviceBean = new DeviceBean();
            deviceBean.setName(name == null ? address : name);
            deviceBean.setAddress(address);
            deviceBean.setState(BluetoothAdapter.STATE_CONNECTED);
        }
        return deviceBean;
    }
斷開設備:
/**
     * 斷開當前a2dp設備
     *
     * @param device device
     */
    private void disconnectA2dp(BluetoothDevice device) {
        if (bluetoothA2dp == null || device == null) {
            return;
        }
        try {
            Method method = BluetoothA2dp.class.getMethod("disconnect", new Class[]{BluetoothDevice.class});
            method.invoke(bluetoothA2dp, device);
        } catch (IllegalAccessException e) {
            e.printStackTrace();
            Utils.logE(TAG, e.getMessage());
        } catch (InvocationTargetException e) {
            e.printStackTrace();
            Utils.logE(TAG, e.getMessage());
        } catch (NoSuchMethodException e) {
            e.printStackTrace();
            Utils.logE(TAG, e.getMessage());
        }
    }
具體代碼參考源碼,謝謝。
備註,加載已連接的藍牙設備是隻針對該應用,也就是說只加載在該應用中進行連接的設備,對於通過設置連接的設備,不做處理。
本應用只是提供一個雛形,更多功能需求還需要自己去完善
功能演示
開啓藍牙 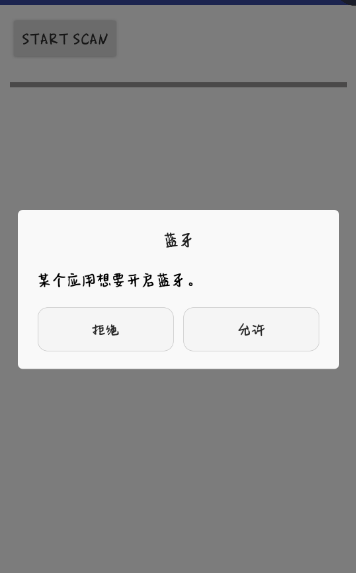開啓掃描並過濾掃描結果

發起連接,在發起連接時,系統會自動爲其進行配對操作
連接成功顯示
在殺死應用或者重啓手機,重新進入應用時依舊可以看到已連接的設備